(Article written by Physch)
“CG Top Tier” -Anonymous
Feedback appreciated - I can be found on the Summoner Wars' 2 Discord as Physch.
Play Style / General Guidelines
Sneeks (the Cave Goblin (CG) Summoner) typically wants to play FAST. Your goal is to play your entire deck in about 6 turns (7 max)… and ideally to win before you deck out. That means playing or discarding at least 4/5 cards every turn.
Sneeks typically has more magic than he needs, unless he's in a matchup where playing the Eater is important. The total cost of all cards in Sneeks' deck is ~ 25 if Smeg sees two turns of activity and Blarf is fully boosted:
- 2 turns of Smeg
- 5 boosts on Blarf
- 6 for The Eater
- 4x2 Beast Riders
- 2x1 Unrelenting
- 2x1 Enrage the Horde
This could be a bit higher if any Beast Riders are summoned twice due to Unrelenting.
Under a more realistic set of assumptions, Sneeks will need ~ 15 magic (2x1 Enrage the Horde, 2x1 Unrelenting, 3 boosts on Blarf, 2 turns of Smeg, 3 Beast Riders summoned). This 15 magic will typically come from destroying opponent units or gates, but discards of The Eater, Beast Riders, 1 gate, and 1-2 copies of Pile On will usually give Sneeks sufficient magic to play his most important cards.
In Summoner Wars 2, there is a total of 60 magic available in the entire game as each side has 30 total non-Summoner cards that can either be built for magic or destroyed by the opponent to capture magic. Sneeks only needs 15 magic to be in good shape. That means that the longer the game goes on, the more opportunity there is for your opponent to use their cards to aggressively build magic and summon higher-value cards. In addition, your units are relatively easy to kill. Sneeks wants to win via tempo in most cases.
Early Game Advice
Early Game your goal should be to get Sneeks into the action. I will usually Sly Sneeks into the front rank on Turn 1 for four key reasons. First, this allows Sneeks to play a forward gate, helping keep the aggression up. Second, any attacks on Sneeks by your opponent means that they are not killing your units, capturing magic and sapping your momentum. Third, remember, you are all about tempo. Having Sneeks in the front row allows you to get a minimum 2 turns of 3 attacks in the first two turns before he Slys to safety. And fourth, the risk of an assassination of Sneeks from most factions skyrockets by mid-game (i.e. against Polar Dwarves once they set up their ice fortress) - so you have to use him early.
If you are going first, a front-rank Sneeks is less risky, as you can often clear the opponent’s units and minimize the risk of an OTK (One Turn Kill). Against Summoners that can set up an OTK combo against Sneeks, they are also less likely to have the right draw if they are going second (vs. 1st where they have already discarded and seen more of their deck).
The only summoner I would not recommend sending Sneeks into the front rank against, particularly if going second, is Grognack (Tundra Orcs). All Grog needs to kill Sneeks is For Glory and either Fury or Brutal Force and a common or two - not an uncommon draw. All other Summoners need a more complex draw for an OTK (FK is probably the next easiest, but at a minimum SE and SA can get there too).
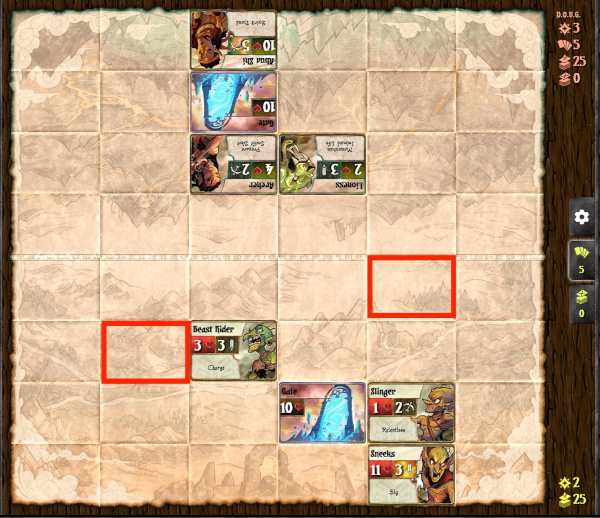
Gate placement early game is usually pretty straightforward. Ideally you want to be able to play gates in the red boxes below, as this allows you to easily place Clingers to Cling onto other units. The top-right location can be placed in T1 by moving the Slinger out of the way (potentially using Sneak!) and then moving Sneeks up two spots, and of course, the one in the third rank is always allowed.
I would also generally summon any units I have on T1, even if I don't have an immediate use for them, particularly if you do not have a gate in hand. This allows you to dig further into your deck for gates, etc. Climbers in particular are excellent to place in the back row, as they can easily get to the front moving directly through gates. A back row climber can also be very useful for Sneeks to Sly back to after the first turn.
Mid-Game Advice
Mid-Game you're typically trying to accomplish 1 of 3 goals depending on the board state and the matchup:
- Corner the opposing Summoner with your units, creating an inevitable kill.
- Consistently wipe the opponent's units with extra attacks from Slingers, Smeg, Enrage the Horde, Pile On, etc. If they are not building magic aggressively (usually a mistake against the CG) then this can clog your opponents.
- Crowd and destroy their gates. This often requires a good Pile On or Enrage the Horde (e.g. with Blarf) turn.
Usually I try to keep all three of these options 'in play' and only focus on one of them when there is a clear path to victory. This means that it can be useful (even in the early game) to take pot-shots on the opponent’s starting gate - destroying a 7 health gate mid-game is remarkably easier than one with 10 health. The same is true with the opponent Summoner.
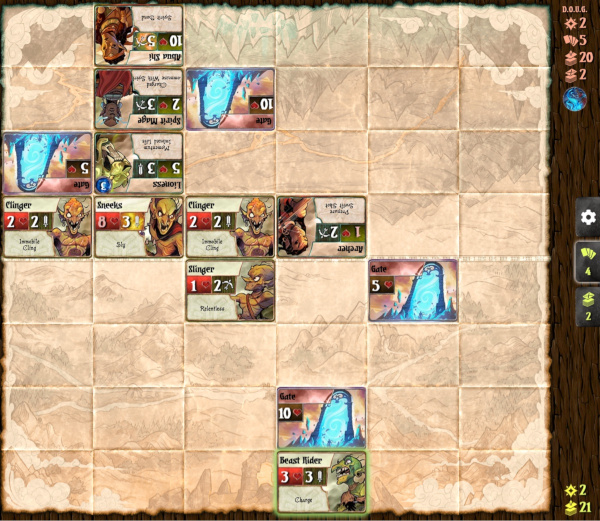
If possible, it's good to have Sneeks near - but not in - the action in the mid-game. This allows you to attack with Sneeks, Sly out, and then in the following turn you are close enough to repeat the strategy. This needs to be done with care, however, as many Summoners have the ability to clear blocking units. An example can be seen below, where Sneeks can attack the Lioness and then Sly to the left Clinger to potentially allow the Clinger to kill the Lioness.
Late Game Advice
This section only exists if you are in trouble! Sneeks should ideally never see a late game. However, it's possible that your opponent has done a good job of building fortifications or clearing your units, or you drew too many events early / late and your hand didn't flow well. If so don't worry - you can still pull out a victory!
First, the trick I mentioned mid-game of having Sneeks and another unit “back-to-back” can be extremely effective late-game if the enemy Summoner has decked out. It can allow you to attack with Sneeks AND another unit and still have a meat shield between you and the enemy Summoner.
Second, it is most likely if you've gotten to this point, that either your enemy is (a) close to having their gates destroyed and / or (b) has low Summoner health. If this is the case, your job is to throw all of your chips into the middle. If you can get any common unit face-to-face with the enemy Summoner or gate (using Sneak, Beast Rider movement, Clingers, etc.) you can throw a minimum of 4 dice at the enemy (e.g. with a Climber and then Sneeks Slying in). According to the GREAT dice tool on the site your odds if you throw 4 melee dice are as follows:
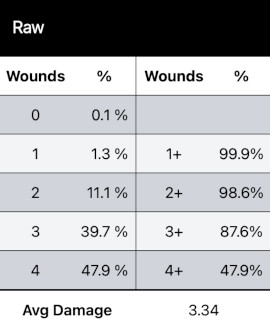
This means if the enemy Summoner has 4 health and you can get any common within melee range, you have a 50% chance to win the game. 88% if the enemy has 3 health! And yeah, if you whiff, Sneeks is probably dead - but if you're at this point in the match, you should take a 50% chance to win!
This makes the end game all about mobility and positioning. Figure out what cards you have left in your deck and how you could potentially set up a way to get within melee striking range - and then start setting up for it. Sneeks has so many mobility tools that it can be quite difficult for your opponent to play around all of them, particularly as they don't know exactly what you have left.
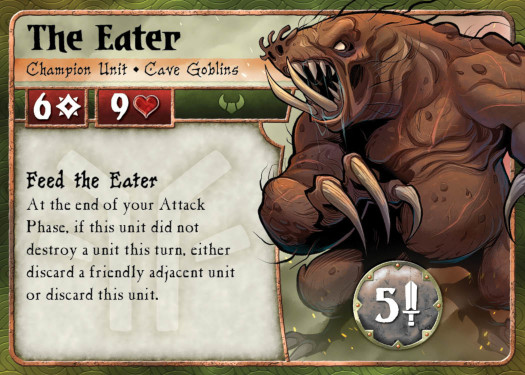
Last advice for late-game - this is a PERFECT time to draw The Eater. You likely have lots of magic at this point. If The Eater is in your last ~ 10 cards I would not discard it regardless of matchup - it will sometimes save you the game.
Card Discussion - Sneeks
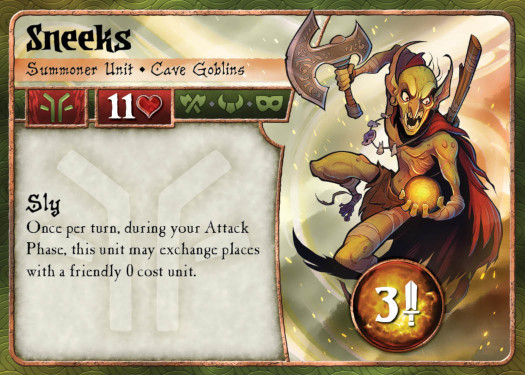
Sneeks has, in my opinion, the best Summoner ability in the game. The ability to Sly in and out of combat with infinite range is incredible, and for Sneeks' base deck he can Sly with every unit except The Eater and Beast Riders.
Sneeks is moderately fragile - 11 isn't a lot of life, and if you follow the strategy of Slying him into the front rank in Turn 1, he will usually have 7 health for most of the game. However, with careful positioning you can still use him effectively at that health level.
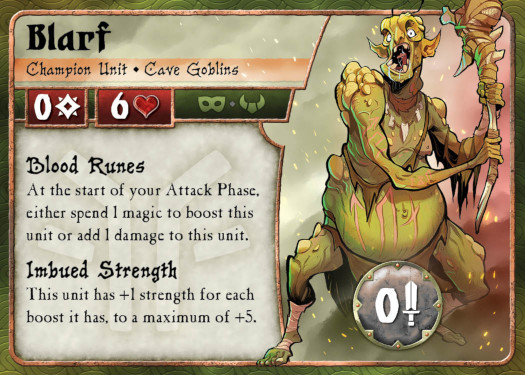
One of the most useful ways to use Sneeks is to Sly him with a boosted Blarf. Let's say you have Blarf on the board with 4 boosts - and you have Enrage in your hand. That means you can hit a single target with 11 melee just with Sneeks and Blarf (3 Sneeks, 4 Blarf after Sly, 4 Blarf after Enrage). Ouch!
Of course, this still works even without Blarf - Sneeks + a Clinger + Enrage still allows you to throw 7 dice at a single target.
Slying Sneeks with either Slingers or Smeg can also be helpful to maximize the number of attacks you have on a target - Sneeks takes one of your normal attacks, but the Slinger / Smeg doesn't count. Like with Blarf above, this can be very effective with Enrage.
Slying Sneeks with Climbers, particularly if you just played a forward gate, can also be useful if you need Sneeks to retreat. While a forward gate above you on the board can typically block further mobility, Climbers can climb over that gate and keep going!
Card discussion - Champs
Blarf and Smeg both have excellent synergy with Sneeks' events as they are 0 cost units. They are also both relatively efficient to play at any time during the game. A few things to keep in mind:
- There are a couple of ways to play Blarf. You can either summon him forward and use him as a meat shield / distraction so that the enemy does not kill your commons. He does tend to get a lot of attention since he can be so dangerous. Or, alternately, you can summon him further back and boost him up, with the idea that you will slowly move him to the front or Sly him in. Note that Blarf can still do damage using Pile On even if unboosted!
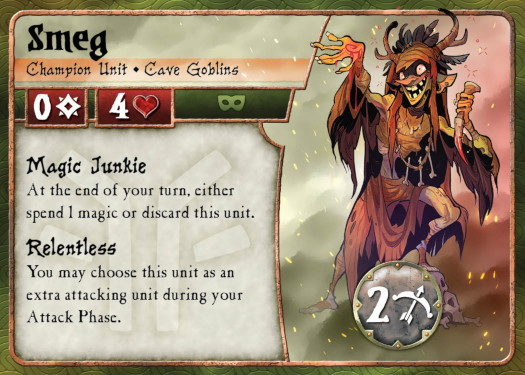
- Smeg is pretty cool. First, you don't have to pay for him until the end of your turn, which allows you to generate magic by killing enemy units / gates or by discarding to pay for him. Second, you can see what your new draw is before paying for him - so if you see that you're going to need the magic next turn (e.g. for Enrage, Unrelenting, or a Beast Rider) then you can discard him. Third, if he's going to be easily killed by your opponent then why give them the magic? Just discard him.
The Eater early or mid-game is an auto discard for me, except against certain factions. He's too expensive for his strength and his ability is quite easy to play around in many cases. Because of his ability he also leads to inefficient plays - i.e. by attacking 3-health units (wasting some of his attack value) to ensure that you get a kill. Or by having nearby commons not doing anything just to be eaten in case The Eater whiffs on an attack. The best use of the Eater is against factions that will destroy your low-health commons (i.e. FK) or if you can summon him in a way that corners the enemy summoner (i.e. off a forward wall or late game where positioning is pretty well understood).
Card Discussion - Commons
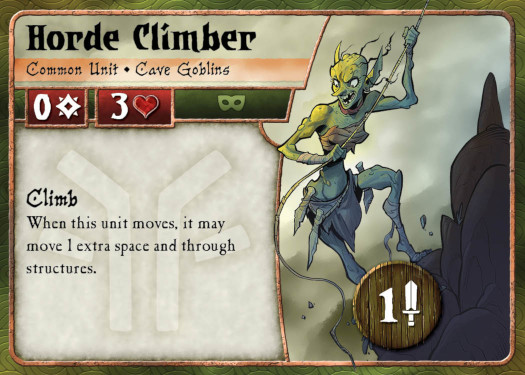
Horde Climber. This is the superstar common. 3 health means that the Climber doesn't die easily, requiring an enemy with 3 attack value to destroy (and even then only being successful 57% of the time). 3 movement through walls allows the Climber to get behind enemy lines, effectively clog gates, and bring Clingers with them. Using Cling and the 3 movement of a Climber allows a Clinger to effectively move 4 squares.
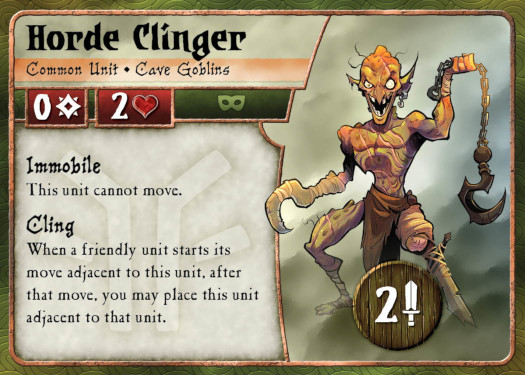
Horde Clinger. This common helps Sneeks deal with his limited mobility on turns where he doesn't have Sneak in hand. If you have 8 units on the board but can only move 3 of them, unless the positioning of the other 5 is good, you can end up in trouble. Clingers can move with other units, which helps increase the ability of the faction to move around. The most important thing with Clingers is to ensure that they can't be cut off in subsequent turns. If you don't have Sneak in your hand and a Clinger is orphaned with nothing to Cling to, it effectively becomes a blocking unit for both you and your opponent since they are not ranged. Of particular note with Clingers is to keep in mind chaining Cling movements - this can often help you get within range of a key target, particularly when combined with Sneak.
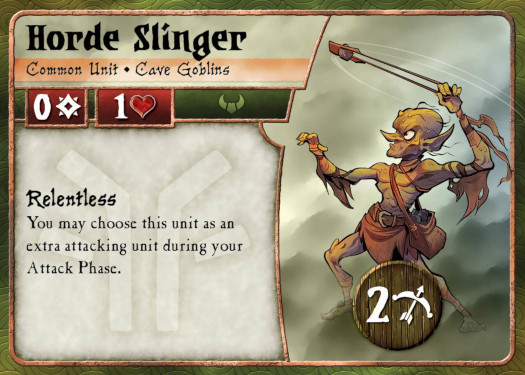
Horde Slinger. This common helps Sneeks deal with his limited number of attacks, similar to how the Clinger addresses Sneeks' movement challenges. One of the most useful ways to use Slingers is on Pile On / Enrage turns to destroy gates, champs, or summoners. Even if you can't move a slinger up to melee range, if it attacks with range and there are other friendly units surrounding the enemy, the Slinger can throw a lot of dice. If the enemy is surrounded by 3 other Goblins, the Slinger will throw 5 dice with Pile On, with about a 50% change of 4+ hits.
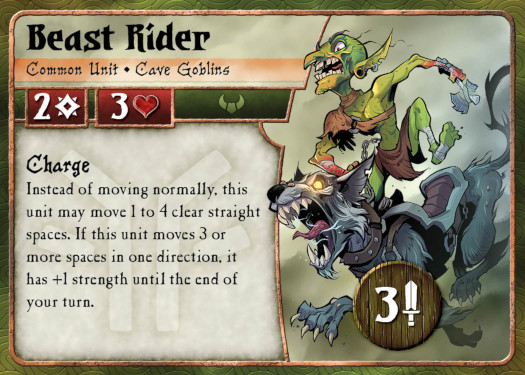
Beast Rider. This common synergizes extremely well with the Clinger. By Clinging onto a Rider, a Clinger can move 5 spaces, ending its turn next to a unit that with 3 health isn't an automatic kill by your opponent, particularly since the Rider can then throw 4 dice. The existence of Beast Riders is a reason to not always place forward gates; 1 or 2 gates in e.g. the third row can help the Rider race to victory.
Card Discussion - Events
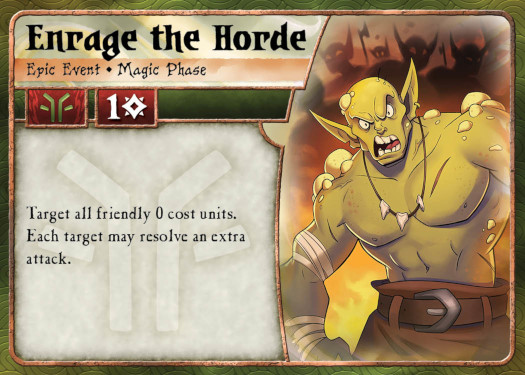
Enrage the Horde. This event is awesome as it allows every 0 cost unit to resolve an extra attack. It is not an active event, so it can be played twice on the same turn if you have two copies, which allows your 0 cost units to resolve 3 attacks on a turn! Unfortunately Sneeks has to worry about tempo and having his hand clogged, so it's usually worth using Enrage the Horde even if you're only getting 2-3 extra attacks (i.e. early game to kill an extra unit and ping a gate). Ping damage is quite relevant for Sneeks, as discussed in the “Mid-Game” section above. Enrage obviously synergizes extremely well with Pile On, but in general it is not worth holding onto either to wait for the combo since tempo is so important. One unique way to use Enrage the Horde is to kill any of your units that are blocking a subsequent attack on a target (i.e. Clinger attacks gate; 2nd Clinger kills first clinger, allowing Smeg to attack same gate).
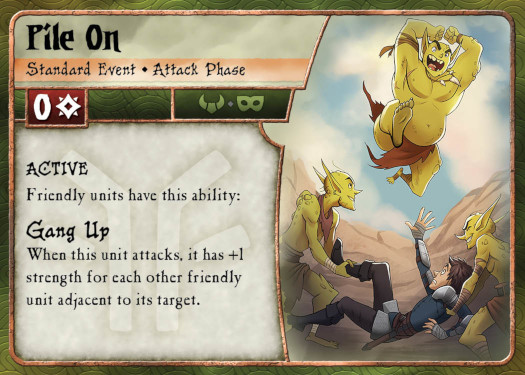
Pile On. This event is pretty situational and is often discarded if I need the magic. That having been said, even being able to throw an extra 2-3 dice can be important, so usually (as with all of Sneeks' events) I try to figure out if there's a useful way to use it before discarding. Almost never worth holding onto - either use it or discard it.
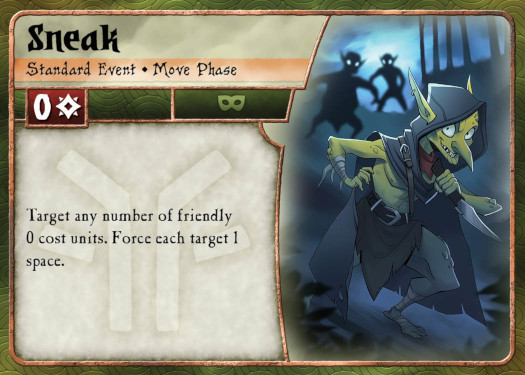
Sneak. The superstar event for Sneeks, in my opinion, and given the name should have been Sneeks' epic event! Sneak helps you do the following: (1) move commons away from gates to provide room to summon in future turns (often a turn 1 or 2 use); (2) allow your units to move towards enemy targets; (3) move clingers to units to Cling to; and (4) let clingers move after they have Clung during movement. (4) is quite important - e.g. a Climber with a Clinger attached can move up to an enemy gate, drop off the Clinger on the corner of the gate, and then Sneak the Clinger to the side of the gate, blocking 2 sides of the gate and allowing for optimum attacks. The fact that 2 copies of Sneak can be used in a turn provides incredible mobility, though it's usually a poor draw if you draw 2 copies as you will have insufficient commons to take full advantage (unless it's after an Unrelenting turn). Early game if I draw Sneak and I can't effectively use it I'll discard it, but late game I always hold it.
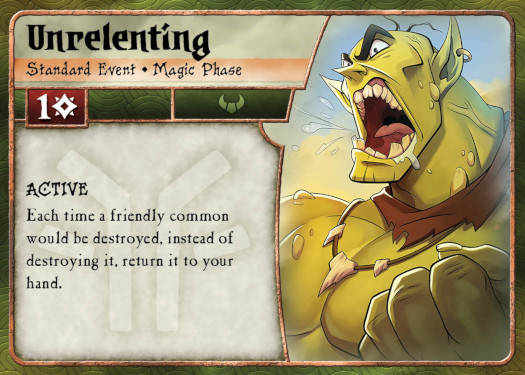
Unrelenting. This event is an auto-play in my opinion, even if you only have a couple of commons on the board. Basically I see this as having two applications: 1) early game when you have few units out, but magic denial to your opponent builds tempo, so you should play it; or (2) later game when you have lots of units out and it's higher value, and you should play it. Unrelenting also prevents certain enemy abilities that trigger on death of a unit from triggering (but not e.g. Tacullu's Mind Capture).
Matchup Notes
A few notes on matchups:
- Breakers - Standard strategy applies, focus on tempo. Breaker units are relatively fragile so you should have lots of magic. Ideally, Sly Sneeks out of the front line while he still has 5+ health, Breakers have lots of assassination tools to go after a very low health Sneeks. Key unit: Climber.
- Cave Goblins mirror - I have not played this much, but I'd say whoever goes first probably has the advantage. That having been said, I think I'd play pretty defensively on this matchup if my opponent is playing aggressively - always easier to assassinate Sneeks if he comes to you. Key unit: Climber.
- Fallen Kingdom - Well, all those Slingers get built for magic now to pay for The Eater! Slingers are just too easy for Undead Carriers to digest. I'd usually take an aggressive approach early if you can get a good position and get some hits in on Ret-Talus, then you're looking at an assassination play from there. But definitely don't leave Sneeks too exposed once he's been hit a few times, Ret has a ton of assassination tools. Key unit: The Eater.
- Phoenix Elves - The fragile units of Sneeks are a problem here, but Maldaria is pretty easy to kill if you can get in her face. Always keep Sneeks back once he's down on health as Mal can easily deal with blockers. Tempo is incredibly important against Phoenix elves, and I often find a gate destruction strategy works well. Key unit: Climber.
- Polar Dwarves - Same as for a few others, important to keep Sneeks back once he's down on health due to the risk of Ice Ram+ Glacial Shift. That having been said, a gate crowding strategy can be very effective. First, because if you destroy the gates and Ice Golems, they can't be rammed into your units. Second, Ram and Shift only work if there's space for the structures to move. If you keep up close and personal, it can be hard for Svara to effectively attack. Svara generally has trouble doing a lot of direct damage to Sneeks without Ram-Shift, so she needs to get Sneeks down in health to put him in danger - keep an eye out for the risk of an Ice Smith and Bear that can reach Sneeks. Key unit: Climber.
- Savanna Elves - Charge! This one's all about tempo. Against the Savanna Elves you want to kill their units faster than they can create 'em. Their units are expensive - if you can keep their board clear and they have 3 or less magic you are in an awesome spot. Key unit: Climber.
- Tundra Orcs - This one's tricky because Grog can OTK Sneeks relatively easily… if you put Sneeks at risk. On the other hand, Sneeks can OTK Grog relatively easily… if your opponent puts Grog at risk. I generally play the unit wipe game here and try to get ping damage on Grog to force him to back off - then you can start putting pressure on gates. Or just kill him if he comes to you. Key unit: Slinger.
- Vanguards - Charge! Same as SE, Vanguard units are expensive and if you play it right, Sera's ability to get an economic advantage won't be relevant. Sera’s only "surprise" is Renewed Hope, so you can afford to be a bit more aggressive with Sneeks than several other matchups. Key unit: Rider.
- Skyspear Avians - Charge! Same strategy as SE and VG. Protect Sneeks a bit more than normal, though, as Sky Assault combined with Flight can put a low-health Sneeks at risk quickly. I'd steer away from Slingers near Ava, though, as Divers mean Slingers are just free magic. Key unit: Climber.
- Cloaks. Charge! Cloaks have lots of assassination tools but Vlox has to be in the middle of things to be effective. Focus on killing Machinists as much as possible as those extra attacks from Machinists help Vlox deal with your many units. While Cloaks have lots of assassination tools, this is one where I generally recommend keeping the pressure on - if you let Vlox get set up, your position will weaken rapidly. Key unit: Slinger